gatsby-plugin-disqus 플러그인 추가
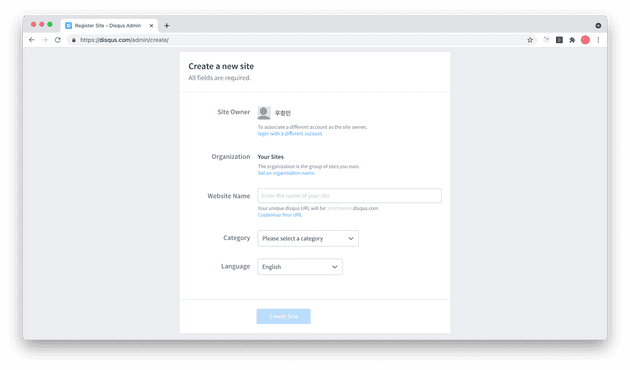
먼저 Disqus 가입을 합니다. Website Name으로 들어갈 shortname을 기억해주세요.
gatsby-plugin-disqus를 설치합니다.
npm install -S gatsby-plugin-disqus
gatsby-config.js에 다음과 같이 설정합니다. Disqus 가입 시 적은 shortname을 아래와 같이 options에 꼭 추가해주세요.
module.exports = {
  plugins: [
+    {
+      resolve: `gatsby-plugin-disqus`,
+      options: {
+        shortname: `jeongminwoo`,
+      },
+    },
  ]
}
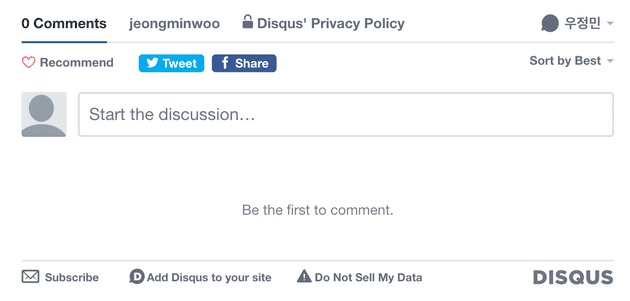
Disqus 컴포넌트를 blog-post.js에 추가합니다. Disqus에서는 댓글들을 discussion이라는 곳에 저장하는데, discussion은 Disqus의 config 프로퍼티를 참고하여 생성됩니다. url은 해당 포스트의 url, identifier는 해당 댓글이 작성될 discussion의 id, title은 해당 discussion의 타이틀입니다. url은 포스트를 수정하면서 쉽게 변경될 수 있으니 꼭 identifier를 같이 전달합시다. title은 포스트의 타이틀 그대로 사용했습니다. 컴포넌트를 추가한 사진은 아래와 같습니다.
+import { Disqus } from "gatsby-plugin-disqus"

const BlogPostTemplate = ({ data, location }) => {
  const post = data.markdownRemark
  ...
+  const disqusConfig = {
+    url: data.site.siteMetadata.siteUrl + location.pathname,
+    identifier: post.id,
+    title: post.frontmatter.title
+  }

return (
  ...
+  <Disqus config={disqusConfig} />
  ...
)

export const pageQuery = graphql`
  query BlogPostBySlug(
    $id: String!
    $previousPostId: String
    $nextPostId: String
  ) {
    site {
      siteMetadata {
        title
+        siteUrl
      }
    }
    ...
포스트 프리뷰에 댓글 카운트 표시
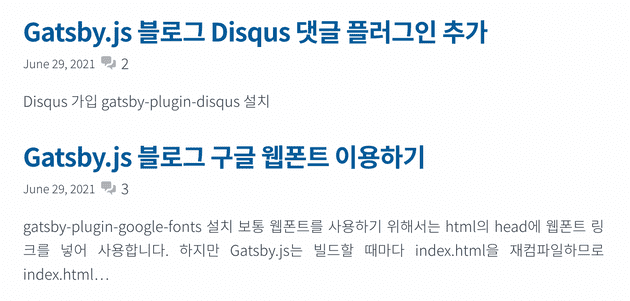
위 사진과 같이 index.js의 포스트 프리뷰에 댓글 수를 나타내기 위해 <CommentCount> 컴포넌트를 사용할 수 있습니다. 이 때 프로퍼티로 들어가는 config은 blog-post.js에서 <Disqus>에 전달한 config과 동일해야 합니다. 추가적으로 꾸미기 위해 heroicons에서 댓글 아이콘을 가져왔습니다.
import { CommentCount } from "gatsby-plugin-disqus"
...
+import { Disqus } from "gatsby-plugin-disqus왔

const BlogIndex = ({ data, location }) => {
  ...

  return (
    <Layout location={location} title={siteTitle}>
      <SEO title="Home" />
      <Bio />
      <ol style={{ listStyle: `none` }}>
        {posts.map(post => {
          const title = post.frontmatter.title || post.fields.slug
+          const disqusConfig = {
+            url: data.site.siteMetadata.siteUrl + post.fields.slug,
+            identifier: post.id,
+            title: title,
+          }

          return (
            <li key={post.fields.slug}>
              <article
                className="post-list-item"
                itemScope
                itemType="http://schema.org/Article"
              >
                <header>
                  <h2>
                    <Link to={post.fields.slug} itemProp="url">
                      <span itemProp="headline">{title}</span>
                    </Link>
                  </h2>
 +                  <div className="postPreview">
+                    <small>{post.frontmatter.date}</small>
+                    <svg
+                      xmlns="http://www.w3.org/2000/svg"
+                      className="icon"
+                      viewBox="0 0 20 20"
+                      fill="#B3B3B3"
+                    >
+                      <path d="M2 5a2 2 0 012-2h7a2 2 0 012 2v4a2 2 0 01-2 2H9l-3 3v-3H4a2 2 0 01-2-2V5z" />
+                      <path d="M15 7v2a4 4 0 01-4 4H9.828l-1.766 1.767c.28.149.599.233.938.233h2l3 3v-3h2a2 2 0 002-2V9a2 2 0 00-2-2h-1z" />
+                    </svg>
+                    <CommentCount config={disqusConfig} placeholder={'...'} />
+                  </div>
                </header>
                <section>
                  <p
                    dangerouslySetInnerHTML={{
                      __html: post.frontmatter.description || post.excerpt,
                    }}
                    itemProp="description"
                  />
                </section>
              </article>
            </li>
          )
        })}
      </ol>
    </Layout>
  )
}.postPreview {
display: flex;
flex-wrap: wrap;
align-items: center;
gap: var(--spacing-1);
}
.icon {
width: 20px;
height: 20px;
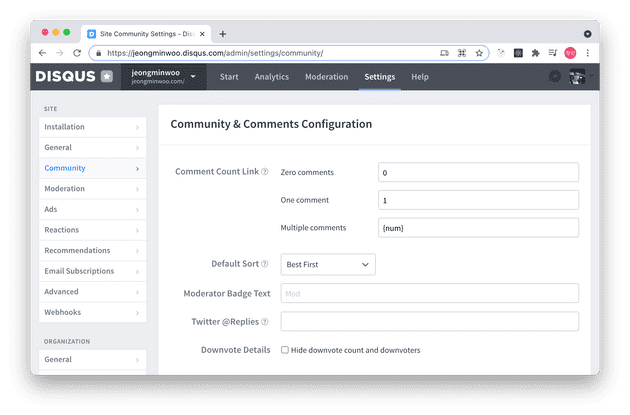
}Disqus의 Admin 페이지 - Community 탭에서 코멘트 수를 나타낼 포맷을 설정할 수 있습니다. 기본값으로 0 일 때 0 Comment, 1일 때 1 Comment, num개 일 때 {num} Comments로 되어 있습니다. 제 경우 뒤에 붙은 Comment를 떼고 숫자만 남겼습니다.
적용 후 기다리면 업데이트됩니다. Disqus의 comment count는 실시간으로 업데이트되지 않으므로 코멘트를 단 후 일정시간 기다려야 함에 주의합니다.


